Solving common problems with outdoor home lighting installations is crucial for both safety and aesthetic appeal. From faulty fixtures to flawed wiring, numerous issues can diminish the effectiveness and longevity of your outdoor lighting. This guide delves into the most prevalent problems, providing practical solutions and preventative measures to ensure your outdoor spaces are well-lit and safe. We’ll explore troubleshooting techniques, cost-effective solutions, and maintenance strategies to help you achieve optimal performance and extend the lifespan of your outdoor lighting system.
Understanding the root causes of these problems—whether it’s improper installation, damaged wiring, or inadequate fixture selection—is paramount. By addressing these issues proactively, you can avoid costly repairs, enhance safety, and significantly improve the overall ambiance of your home’s exterior. This guide provides a comprehensive overview of common challenges, equipping you with the knowledge and tools to tackle them confidently.
Common Outdoor Lighting Problems
Outdoor lighting installations, while enhancing curb appeal and security, can present several challenges if not properly planned and executed. Understanding common issues and their causes is crucial for successful projects, minimizing safety hazards and maximizing aesthetic appeal. This section details five prevalent problems, their underlying causes, resulting consequences, and suggested solutions.
Improper Wiring and Connections
Faulty wiring is a frequent culprit in outdoor lighting malfunctions. This can stem from using inappropriate gauge wire for the distance and amperage requirements, neglecting proper grounding, or employing substandard connectors susceptible to corrosion and water damage. The consequences range from flickering or dim lights to complete system failure, posing electrical shock hazards and potentially causing fire. In severe cases, improper wiring can lead to circuit overload, tripping breakers, and even damaging other household appliances.
Fixture Placement and Design Issues
Poorly planned fixture placement can lead to inadequate illumination, harsh glare, or light trespass into neighboring properties. Choosing inappropriate fixtures for the environment (e.g., using delicate glass fixtures in areas prone to impact) also contributes to problems. Consequences include security vulnerabilities due to insufficient lighting, annoyance for neighbors from excessive light spill, and rapid fixture damage or failure due to unsuitable placement or design choices.
Insufficient or Inappropriate Lighting Levels
Inadequate lighting levels create security risks and reduce visibility, while excessively bright lighting can be blinding and disruptive. Selecting incorrect color temperatures can also impact the overall ambiance and effectiveness of the lighting. The consequences include compromised security, increased risks of accidents due to poor visibility, and negative aesthetic impact from poorly chosen lighting levels and color temperatures.
Water Damage and Corrosion
Outdoor lighting fixtures are exposed to the elements, making them susceptible to water damage and corrosion. This is exacerbated by improper sealing, use of non-weatherproof fixtures, and lack of regular maintenance. Water ingress can cause short circuits, fixture failure, and even electrical shock. Corrosion weakens the structural integrity of fixtures, leading to premature failure and potential safety hazards.
Lack of Maintenance and Regular Inspection, Solving common problems with outdoor home lighting installations
Neglecting regular maintenance and inspections increases the likelihood of various problems. Accumulated dirt, debris, and insect infestations can impede light output and damage fixtures. Loose connections and damaged wiring can go unnoticed, leading to escalating issues. The consequences range from reduced light output and aesthetic degradation to safety hazards stemming from faulty wiring and malfunctioning fixtures.
| Problem | Cause | Consequence | Solution |
|---|---|---|---|
| Improper Wiring and Connections | Incorrect wire gauge, poor grounding, substandard connectors | Electrical shock, fire hazard, system failure | Use appropriate wire gauge, ensure proper grounding, use high-quality connectors |
| Fixture Placement and Design Issues | Poor planning, inappropriate fixture selection | Inadequate illumination, glare, light trespass, fixture damage | Careful planning, choose suitable fixtures for the environment |
| Insufficient or Inappropriate Lighting Levels | Incorrect fixture selection, poor placement, wrong color temperature | Security risks, accidents, poor aesthetics | Select fixtures with appropriate lumens and color temperature |
| Water Damage and Corrosion | Improper sealing, non-weatherproof fixtures, lack of maintenance | Short circuits, fixture failure, electrical shock | Use weatherproof fixtures, ensure proper sealing, regular cleaning and inspection |
| Lack of Maintenance and Regular Inspection | Neglect, lack of awareness | Reduced light output, fixture damage, safety hazards | Regular cleaning, inspection, and maintenance |
Troubleshooting Lighting Fixture Issues
Troubleshooting malfunctioning outdoor lighting fixtures can seem daunting, but a systematic approach simplifies the process. By understanding the common causes of failure and employing the right tools, you can often resolve the issue quickly and safely, saving on potential repair costs. This section Artikels a step-by-step process for diagnosing and resolving problems with your outdoor lighting.
Troubleshooting outdoor lighting often involves addressing issues like insufficient brightness or uneven illumination. Fortunately, resolving these problems doesn’t require a hefty budget; you can find practical solutions by exploring affordable ways to improve home exterior lighting at night. By implementing these cost-effective strategies, you can significantly enhance your home’s nighttime safety and curb appeal, effectively solving many common installation challenges.
Effective troubleshooting begins with a careful inspection of the fixture and its surroundings. This visual assessment helps pinpoint the source of the problem before proceeding to more involved steps. Look for obvious damage to the fixture itself, loose wiring, or any signs of pest infestation. Checking the circuit breaker to ensure power is supplied to the fixture is a crucial first step.
If the circuit breaker is tripped, reset it and check if the light works. If it doesn’t, proceed with the troubleshooting steps below.
Tools and Equipment for Troubleshooting Outdoor Lighting
Having the right tools readily available significantly speeds up the troubleshooting process and ensures safety. The following checklist Artikels essential equipment for effective diagnosis and repair of outdoor lighting fixtures.
- Voltage tester (non-contact is safest): This allows you to check for the presence of electricity without touching any wires.
- Screwdrivers (Phillips and flathead): Various sizes are helpful for removing screws on different fixtures.
- Pliers (needle-nose and lineman’s): Useful for gripping and manipulating wires.
- Wire strippers/cutters: Essential for working with electrical wiring safely.
- Ladder (appropriate height and stability): Ensure a stable and safe working platform when working at height.
- Flashlight: Provides illumination in low-light conditions.
- Replacement bulbs (correct wattage and type): Always have spares on hand.
- Safety glasses: Protect your eyes from debris or sparks.
- Rubber gloves (insulated): Protect your hands from electrical shock.
Diagnosing Problems with Different Fixture Types
Different types of outdoor lighting fixtures have unique troubleshooting considerations. LED, halogen, and incandescent bulbs each present distinct failure modes.
- LED Fixtures: LEDs often fail gradually, dimming before complete failure. Check the connections and ensure the LED module itself isn’t damaged. Sometimes, a simple power cycle can resolve temporary issues.
- Halogen Fixtures: Halogen bulbs can be sensitive to voltage fluctuations and may burn out prematurely if the voltage is too high or too low. Check the transformer if one is used. Also, inspect the bulb for cracks or damage.
- Incandescent Fixtures: Incandescent bulbs typically fail suddenly. Check the bulb for filament breakage. If the bulb is intact, examine the socket and wiring for loose connections.
Replacing a Faulty Outdoor Light Bulb
Replacing a light bulb might seem simple, but adhering to safety procedures is crucial to prevent electrical shock or injury. The following steps provide a safe and effective method for bulb replacement.
- Turn off the power: Locate the circuit breaker controlling the outdoor light and switch it to the “off” position. This is the most important safety step.
- Access the bulb: Use a ladder to safely reach the light fixture. Carefully remove any protective covers or shades.
- Remove the old bulb: Gently twist the old bulb counterclockwise to remove it from the socket. Avoid touching the glass portion of the bulb directly, especially if it is hot.
- Install the new bulb: Carefully insert the new bulb into the socket, ensuring it is properly seated. Twist it clockwise to secure it in place.
- Restore power: Turn the circuit breaker back to the “on” position. Check that the new bulb is functioning correctly.
- Replace covers: Carefully replace any protective covers or shades to ensure the fixture is weatherproof.
Addressing Wiring and Electrical Problems: Solving Common Problems With Outdoor Home Lighting Installations
Outdoor lighting wiring, while seemingly straightforward, can present several challenges. Understanding common issues and safe practices is crucial for ensuring both the longevity and safety of your lighting system. Neglecting proper wiring can lead to malfunctions, electrical hazards, and even fire. This section will address common wiring problems, safe inspection and repair techniques, and the different types of outdoor wiring available.
Common wiring issues in outdoor lighting installations often stem from exposure to the elements. Loose connections, caused by vibration or temperature fluctuations, are frequently encountered. These loose connections can lead to intermittent lighting, flickering, or complete failure. Similarly, damaged cables, resulting from rodent damage, harsh weather, or accidental digging, can disrupt the flow of electricity and pose a safety risk.
Improperly installed or insufficiently protected wiring is another major source of problems, leading to short circuits and potential fire hazards. The type of wiring used also plays a significant role; using inappropriate wire gauge for the load or neglecting proper grounding can lead to overheating and failure.
Inspecting and Repairing Outdoor Lighting Wiring
Safe inspection and repair of outdoor lighting wiring require caution and adherence to safety protocols. Before commencing any work, always ensure the power to the circuit is completely disconnected at the breaker box. Visually inspect all wiring, looking for signs of damage such as fraying, cuts, or exposed conductors. Pay close attention to connection points, looking for loose wires or corrosion.
Use a voltage tester to verify that the power is indeed off before handling any wires. When repairing damaged cables, replace the affected section with appropriately rated outdoor-grade wire, ensuring all connections are secure and properly insulated. Use appropriate connectors designed for outdoor use, and seal any splices with waterproof sealant to protect them from moisture.
Types of Outdoor Wiring and Suitability
Several types of outdoor wiring exist, each with its strengths and weaknesses. UF-B (Underground Feeder) cable is designed for direct burial and is highly resistant to moisture and abrasion. It’s an excellent choice for permanent installations where wires are buried underground or concealed within walls. THWN (Thermoplastic High Heat-Resistant Nylon-coated) wire is a more versatile option suitable for both underground and above-ground applications, provided it’s properly protected from the elements.
This wire offers good resistance to heat and moisture, making it suitable for various outdoor lighting installations. Choosing the right type of wire is crucial; using unsuitable wire can compromise safety and longevity. The wire gauge must also be selected based on the amperage draw of the lighting fixtures to prevent overheating.
Safety Guidelines for Working with Outdoor Electrical Wiring
Before working with any outdoor electrical wiring, it’s imperative to prioritize safety. Here are some crucial guidelines:
The following safety measures are critical when working with outdoor electrical wiring. Failure to adhere to these guidelines could result in serious injury or even death.
- Always turn off the power at the breaker box before working on any electrical wiring.
- Use a non-contact voltage tester to verify that the power is off before touching any wires.
- Wear appropriate safety gear, including insulated gloves and safety glasses.
- Never work on electrical wiring during wet or stormy weather.
- If you are not comfortable working with electrical wiring, consult a qualified electrician.
- Use only outdoor-rated wiring, connectors, and enclosures.
- Ensure all connections are secure and properly insulated.
- Properly ground all electrical components to prevent electrical shock.
Solving Problems with Light Placement and Design
Source: ytimg.com
Effective outdoor lighting isn’t just about illuminating your property; it’s about creating ambiance, enhancing safety, and showcasing your home’s architectural features. Poorly placed lights can lead to glaring hotspots, dark spots, and an overall unattractive aesthetic, negating the intended purpose of the lighting system. Understanding the principles of light placement is crucial for achieving a well-lit and visually appealing outdoor space.Improper light placement significantly impacts both the functionality and aesthetic appeal of outdoor lighting.
For instance, lights positioned too high can create harsh shadows and wash out details, while lights placed too low might be ineffective and create glare. Conversely, strategically placed lights can highlight architectural features, accentuate landscaping, and provide safe and well-lit pathways.
Effective Light Placement Strategies for Different Outdoor Areas
Effective outdoor lighting involves tailoring the placement and type of fixture to the specific area. Pathways benefit from low-level, evenly spaced lights to guide movement and prevent tripping hazards. Consider using bollard lights or path lights along walkways, ensuring sufficient illumination without creating glare. Gardens require a more nuanced approach, employing spotlights to highlight specific plants or features, while uplighting can dramatically showcase trees and shrubs.
Patios and decks should be brightly lit for safety and social gatherings, perhaps using a combination of ambient lighting (like string lights or lanterns) and task lighting (for dining areas).
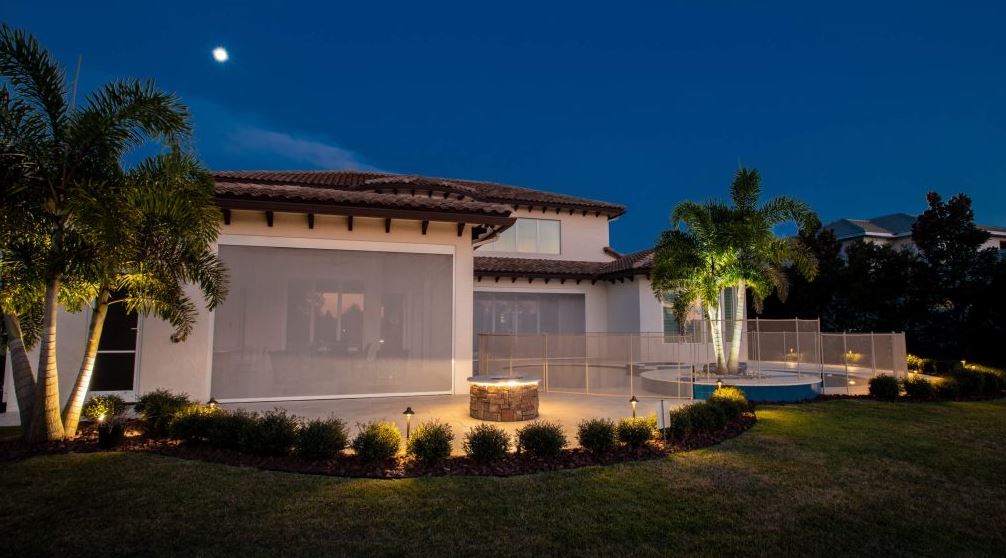
Optimal Light Placement in a Typical Residential Backyard
Imagine a typical rectangular backyard. Along the perimeter, low-level path lights (approximately 12 inches tall) are spaced every 8-10 feet, providing soft illumination for walkways. Two larger spotlights are positioned near the base of a prominent tree, uplighting its foliage to create a dramatic focal point. A string of LED fairy lights is draped across the patio area, offering a warm and inviting ambiance for evening gatherings.
A motion-sensor light is mounted near the back door for security. Finally, several smaller spotlights are strategically placed amongst garden beds, highlighting key plants and flowers. The overall effect is a balanced mix of ambient and task lighting, creating a safe, functional, and aesthetically pleasing outdoor environment. The light intensity is carefully chosen to avoid glare and ensure even illumination across the space.
This design utilizes a combination of warm white and cool white light sources to create visual interest and contrast.
Choosing Appropriate Lighting Fixtures and Intensity
The selection of lighting fixtures and intensity levels is paramount for achieving desired results. For pathways, low-intensity, energy-efficient LED path lights are ideal, providing sufficient illumination without being overly bright. For security purposes, high-intensity motion-sensor lights with a wide beam angle are recommended, while garden accents may benefit from adjustable spotlights that allow for focused illumination of specific plants or features.
Patios and decks can use a combination of brighter lights for task lighting (e.g., over dining tables) and softer ambient lighting (e.g., string lights or lanterns) to create a relaxed atmosphere. Always consider the overall aesthetic and choose fixtures that complement the architectural style of your home and landscape.
Maintaining and Extending Outdoor Lighting Lifespan
Proper maintenance significantly extends the life and effectiveness of your outdoor lighting system. A proactive approach, incorporating regular cleaning and inspections, can prevent costly repairs and premature fixture failure. This section details a practical maintenance schedule and preventative measures to ensure your outdoor lighting remains both functional and aesthetically pleasing for years to come.Regular maintenance is key to maximizing the lifespan of your outdoor lighting fixtures.
Neglecting routine care can lead to accelerated deterioration due to exposure to the elements and potential damage from insects or debris. A simple, consistent maintenance schedule can significantly reduce these risks.
Routine Maintenance Schedule
A comprehensive maintenance schedule should include both visual inspections and hands-on cleaning. Ideally, a thorough inspection should be conducted at least twice a year, in spring and autumn, while cleaning should be performed more frequently, as needed, depending on environmental conditions. For example, areas with heavy pollen or frequent rainfall may require more frequent cleaning. During the inspection, check for loose connections, damaged wiring, corrosion, and insect infestations.
Cleaning involves gently wiping down fixtures with a damp cloth and mild detergent, carefully avoiding any electrical components. For higher fixtures, a telescopic pole with a soft brush attachment can be helpful. Always ensure the power is switched off before commencing any cleaning or maintenance tasks.
Preventing Corrosion and Insect Infestation
Corrosion, a common problem in outdoor lighting, is primarily caused by moisture and exposure to the elements. Using weatherproof materials, such as stainless steel or powder-coated aluminum, is crucial in mitigating corrosion. Regularly inspecting and cleaning fixtures to remove any accumulated moisture or debris can further prevent corrosion. For particularly vulnerable fixtures, applying a corrosion-resistant sealant can provide additional protection.Insect infestations, particularly in fixtures with enclosed spaces, can lead to damage and malfunction.
Regular cleaning helps to prevent insect build-up. Consider using insect repellent sprays specifically designed for outdoor use, focusing on areas where insects might nest. For fixtures with open designs, using mesh screens or covers can act as a barrier against insects.
Successfully tackling common outdoor lighting installation issues, such as uneven brightness or faulty wiring, is crucial for a well-lit property. This often involves careful planning, which can be greatly enhanced by considering creative outdoor lighting ideas to highlight landscaping features , ensuring your design is both functional and aesthetically pleasing. By addressing these practical concerns upfront, you can avoid future headaches and enjoy the full benefits of your improved outdoor illumination.
Benefits of Weatherproof and Durable Materials
Employing weatherproof and durable materials during installation is a significant investment in the longevity of your outdoor lighting system. Materials such as marine-grade aluminum, stainless steel, and high-quality plastics are specifically engineered to withstand harsh weather conditions, including extreme temperatures, moisture, and UV radiation. These materials offer superior resistance to corrosion and damage, reducing the need for frequent repairs and replacements.
While the initial cost might be higher, the long-term savings in maintenance and replacement costs often outweigh the upfront investment. For example, a high-quality stainless steel fixture might cost more initially, but it will likely outlast a cheaper alternative made from less durable materials by many years, resulting in significant cost savings over its lifetime.
Preventative Measures to Extend Lifespan
Prioritizing preventative measures is crucial for extending the lifespan of your outdoor lighting fixtures. A proactive approach can significantly reduce the likelihood of costly repairs and replacements.
- Use high-quality, weatherproof materials during installation.
- Regularly inspect fixtures for damage, loose connections, and corrosion.
- Clean fixtures regularly to remove debris, dirt, and insects.
- Apply corrosion-resistant sealant to vulnerable areas as needed.
- Use insect repellent sprays to deter infestations.
- Ensure proper grounding to prevent electrical hazards and damage.
- Consider using surge protectors to safeguard against power surges.
- Schedule professional maintenance checks periodically for thorough inspection and potential issues.
Budgeting and Cost-Effective Solutions
Transforming your outdoor space with beautiful and functional lighting doesn’t require breaking the bank. By carefully considering fixture choices, embracing DIY solutions, and prioritizing energy efficiency, you can achieve stunning results without exceeding your budget. This section explores strategies for creating a cost-effective outdoor lighting system.Cost-Effective Alternatives to Professional Installation and Fixture ComparisonsChoosing the right lighting fixtures significantly impacts both initial cost and long-term energy expenses.
LED lights, while having a higher upfront cost than incandescent or halogen bulbs, offer substantially lower energy consumption and longer lifespans, ultimately saving money over time. For example, a high-quality LED floodlight might cost $30-$50, but its energy efficiency could save you $10-$20 annually compared to a halogen equivalent, recouping the initial investment within a few years. Similarly, solar-powered lights eliminate the need for wiring and electricity bills, making them a very attractive option for pathways or accent lighting, though their initial brightness may be lower than wired alternatives.
Consider the long-term costs, including bulb replacements and energy consumption, when comparing different fixture types.
DIY Solutions for Common Outdoor Lighting Problems
Many common outdoor lighting problems can be addressed with simple DIY solutions, saving the expense of hiring an electrician. For instance, replacing a burned-out bulb is a straightforward task requiring only a basic understanding of electrical safety precautions. Similarly, cleaning dirt and debris from fixtures can dramatically improve light output, a simple fix that costs nothing but a little time.
If a fixture’s mounting is loose, tightening screws is often sufficient. More complex repairs, like replacing damaged wiring or addressing faulty switches, should only be attempted if you have the necessary electrical expertise; otherwise, professional help is recommended. Even simple repairs can save money compared to professional call-out fees, especially if the problem is minor.
Successfully tackling common outdoor lighting installation issues often hinges on careful planning. Choosing the right fixtures is key, and understanding the nuances of different styles of outdoor lighting for various home designs can significantly impact the final result. By selecting appropriate styles and addressing potential problems proactively, you can ensure a beautiful and functional outdoor lighting system that enhances your home’s aesthetic appeal and provides ample illumination.
Optimizing Energy Efficiency in Outdoor Lighting Systems
Energy-efficient outdoor lighting is not just environmentally friendly; it’s also budget-friendly. Using LED bulbs is a crucial first step, as previously mentioned. Motion sensors can significantly reduce energy consumption by only illuminating areas when needed. Timer switches allow you to schedule lighting to operate only during specific times, further reducing energy usage. Properly positioned lights minimize light pollution and maximize illumination efficiency.
For example, strategically placed spotlights can highlight architectural features without wasting energy on unnecessary illumination. These combined strategies can lead to significant savings on your electricity bill, making your outdoor lighting both beautiful and cost-effective.
Closing Summary
Ultimately, mastering the art of outdoor home lighting installation and maintenance boils down to proactive problem-solving and a commitment to preventative care. By understanding the common pitfalls and employing the troubleshooting techniques and preventative measures Artikeld in this guide, you can ensure your outdoor lighting system functions efficiently, safely, and aesthetically for years to come. Regular inspections, appropriate fixture selection, and careful wiring practices are key to maximizing the lifespan and performance of your investment, creating a welcoming and secure outdoor environment.
FAQ
What type of bulbs are most durable for outdoor use?
LED bulbs are generally the most durable for outdoor use due to their resistance to shock and vibration, and their longer lifespan compared to incandescent or halogen options.
How often should I inspect my outdoor lighting system?
Ideally, you should inspect your outdoor lighting system at least twice a year, once before the start of winter and once in spring, checking for damage, loose connections, and insect infestations.
Can I use indoor wiring for outdoor lighting?
No, indoor wiring is not suitable for outdoor use as it lacks the necessary weatherproofing and insulation to withstand the elements. Always use outdoor-rated wiring for exterior installations.
What should I do if I encounter a short circuit in my outdoor lighting?
Immediately turn off the power to the circuit at the breaker box. Do not attempt to repair the short circuit yourself unless you are qualified to work with electricity. Contact a qualified electrician.
How can I prevent corrosion on my outdoor light fixtures?
Choose fixtures made from corrosion-resistant materials like stainless steel or powder-coated aluminum. Regularly clean fixtures to remove dirt and debris that can accelerate corrosion.

- TikTok Lite Apk Mod Download Versi Lebih Ringan & Hemat Kuota - June 27, 2026
- SSSTikTok Tanpa Tanda Air: Download Video, Story, Sound TikTok - June 27, 2026
- Transform Your Space with Functional Home Decor Solutions - June 27, 2026