How to install landscape lighting to improve home curb appeal is more than just adding lights; it’s about transforming your home’s exterior into a captivating nighttime spectacle. This guide delves into the art and science of illuminating your landscape, from initial planning and equipment selection to installation and maintenance. We’ll explore various lighting styles, techniques, and safety precautions to ensure your project enhances your home’s curb appeal and creates a welcoming atmosphere.
We’ll cover everything from choosing the right fixtures and bulbs to understanding electrical considerations and creating stunning lighting designs. Learn how to strategically place lights to highlight architectural details, accentuate landscaping, and illuminate pathways, all while maximizing energy efficiency and safety. Get ready to illuminate your home’s potential!
Planning Your Landscape Lighting Project
Creating a stunning landscape lighting scheme involves careful planning to ensure both functionality and aesthetic appeal. This process considers the existing landscape, the types of fixtures used, and the appropriate lighting levels required. Proper planning prevents costly mistakes and ensures the final result enhances your home’s curb appeal.
Landscape Lighting Fixture Types
Choosing the right lighting fixtures is crucial for achieving the desired effect. Different fixtures offer unique advantages and disadvantages, making careful selection essential. The following table summarizes the characteristics of common landscape lighting options:
| Fixture Type | Pros | Cons | Typical Application |
|---|---|---|---|
| Path Lights | Provides soft, ambient illumination; enhances safety; relatively low maintenance. | Can be expensive if many are needed; requires even spacing for consistent lighting. | Lighting walkways, garden paths, and driveways. |
| Spotlights | Highly directional; ideal for highlighting specific features; offers flexibility in placement. | Can create harsh shadows if not positioned correctly; may require more frequent maintenance. | Accentuating trees, sculptures, architectural details, or water features. |
| Well Lights | Subtle and unobtrusive; provides uplighting; creates a soft glow. | Limited light coverage; requires careful placement to avoid glare. | Illuminating walls, steps, or planting beds from below. |
| Flood Lights | Provides broad, even illumination; ideal for large areas; cost-effective for wide coverage. | Can be harsh and overpowering if not used carefully; may consume significant energy. | Lighting large areas such as lawns, driveways, or parking areas. |
Designing a Lighting Plan, How to install landscape lighting to improve home curb appeal
Careful consideration of existing landscape features is paramount in creating an effective lighting plan. Trees, shrubs, architectural elements, and water features all influence light placement and the overall effect. A systematic approach ensures a well-integrated and aesthetically pleasing result.Here’s a step-by-step guide to designing your lighting plan:
1. Sketch your landscape
Create a simple drawing of your yard, including all key features (trees, shrubs, buildings, walkways, etc.).
2. Identify focal points
Determine the elements you want to highlight (e.g., a majestic oak tree, a beautiful fountain).
3. Determine lighting needs
Decide whether you need ambient lighting (general illumination), accent lighting (highlighting features), or task lighting (illuminating walkways).
4. Choose fixture types
Select appropriate fixtures based on the lighting needs and the characteristics of your landscape.
5. Place fixtures on the sketch
Indicate the location of each fixture on your drawing, considering the direction and spread of light. For example, a spotlight should be positioned to highlight the feature, not to create glare or harsh shadows. Path lights should be spaced evenly along walkways.
6. Consider light layering
Incorporate multiple layers of lighting (ambient, accent, task) to create depth and interest.
7. Review and refine
Review your plan to ensure it meets your needs and enhances the aesthetic appeal of your landscape.
Calculating Lighting Needs
Determining the number and wattage of lights required involves understanding the area to be illuminated and the desired light levels. This calculation helps ensure adequate lighting without excessive energy consumption or harsh illumination.The process typically involves:
1. Measuring the area
Determine the square footage of each area you intend to illuminate.
2. Choosing appropriate lumens
Lumens measure light output. The required lumens per square foot depend on the type of lighting and desired brightness. For example, path lighting might require 10-20 lumens per square foot, while accent lighting on a tree could require significantly less.
3. Selecting fixture lumens
Choose fixtures with lumens matching your needs per area.
4. Calculating the number of fixtures
Divide the total lumens needed by the lumens per fixture to determine the number of fixtures required for each area.
5. Considering wattage
While lumens indicate light output, wattage reflects energy consumption. LED lights offer high lumens with low wattage, making them an energy-efficient choice.
Example: A 100 sq ft walkway requiring 15 lumens/sq ft would need 1500 lumens total. If each path light produces 150 lumens, 10 path lights would be needed (1500 lumens / 150 lumens/light = 10 lights).
Choosing the Right Lighting Equipment
Source: prestigeoutdoorlighting.com
Selecting the appropriate lighting equipment is crucial for achieving the desired aesthetic and functionality in your landscape lighting project. The choices you make regarding bulb type, fixture design, and transformer capacity will directly impact the energy efficiency, lifespan, and overall effectiveness of your lighting system. Careful consideration of these factors will ensure a beautiful and long-lasting installation.
Light Bulb Types: A Comparison
The selection of light bulbs significantly influences the performance and longevity of your landscape lighting. Different bulb types offer varying levels of energy efficiency, lifespan, and color temperature. Understanding these differences is essential for making an informed decision.
- LED (Light Emitting Diode): LEDs are known for their exceptional energy efficiency, consuming significantly less power than other options. Their lifespan is remarkably long, often lasting for many years. They offer a wide range of color temperatures, from warm white to cool white, allowing for versatile aesthetic choices. For example, a 10-watt LED bulb can produce the same light output as a 60-watt incandescent bulb, resulting in substantial energy savings over its lifetime.
- Halogen: Halogen bulbs offer brighter light than incandescent bulbs but consume more energy than LEDs. Their lifespan is shorter than LEDs but longer than incandescent bulbs. They produce a warmer light than LEDs, often preferred for creating a cozy atmosphere. However, their heat output is higher, requiring careful consideration of fixture selection and potential safety concerns.
- Incandescent: Incandescent bulbs are the least energy-efficient option. They produce a warm, inviting light but have a relatively short lifespan and generate significant heat. While their initial cost is low, the ongoing replacement costs and energy consumption make them a less economical choice in the long run.
Fixture Selection: Light Output and Beam Angle
Choosing fixtures with the appropriate light output (measured in lumens) and beam angle is essential for achieving the desired lighting effect. Insufficient lumens will result in dimly lit areas, while excessive lumens can create harsh, glaring light. The beam angle determines the spread of light.A narrow beam angle (e.g., 10-20 degrees) creates a focused, concentrated beam of light, ideal for highlighting specific features like trees or sculptures.
A wide beam angle (e.g., 60-120 degrees) provides a broader, more diffused light, suitable for pathways or general area illumination. For instance, a narrow beam spotlight might be used to accentuate a fountain, while a wide-angle floodlight could illuminate a driveway.
Transformer Types and Specifications
Transformers are essential components of low-voltage landscape lighting systems, stepping down the voltage from the mains supply to a safer level (typically 12 volts). Different transformer types offer varying features and capabilities.
| Transformer Type | Voltage Output | Wattage Capacity | Features |
|---|---|---|---|
| Electronic Transformer | 12V | Variable (e.g., 150W, 300W) | Compact size, energy-efficient, quiet operation |
| Magnetic Transformer | 12V | Variable (e.g., 100W, 200W) | Durable, reliable, but larger and less energy-efficient than electronic transformers |
| Auto-transformer | 12V | Variable (e.g., 150W, 300W) | Smaller than magnetic transformers, provides constant voltage even with fluctuating loads. |
Installing the Landscape Lighting System
Installing a low-voltage landscape lighting system enhances your home’s curb appeal and provides practical illumination. This process involves careful planning, precise execution, and adherence to safety guidelines. Successful installation ensures a long-lasting, aesthetically pleasing, and functional lighting system.
The installation process is best approached systematically, moving from planning the layout to connecting the final fixture. Accurate planning minimizes rework and ensures a professional finish. Remember to always turn off power at the breaker box before working with any electrical components.
Digging Trenches and Laying Wires
Proper trenching and wire placement are crucial for a safe and aesthetically pleasing installation. Trenches should be dug to a consistent depth and width, ensuring the wires are adequately protected and hidden from view. Incorrect placement can lead to damage, compromising the system’s functionality and safety.
Begin by marking the path of your wiring using stakes and string. Dig trenches approximately 6-8 inches deep, ensuring a consistent depth along the entire route. The width should be sufficient to comfortably accommodate the wiring and allow for backfilling. Maintain a consistent distance between the trench and any underground utilities to prevent accidental damage. For example, keep at least 18 inches away from gas lines and water pipes.
After laying the wire, carefully backfill the trench, ensuring the wire is completely covered and protected. Use a non-compacting backfill material like topsoil to prevent damage to the wire.
Consider the illustration below: Imagine a straight line representing the planned path of the lighting system. Along this line, evenly spaced dots represent the location of light fixtures. The trench is a slightly wider, rectangular area extending below this line, with a depth of 6-8 inches. The low-voltage wire runs within this trench, connecting the transformer to each light fixture.
Boosting your home’s curb appeal with landscape lighting involves careful planning and placement. Consider highlighting key features like trees or pathways. For maximizing your reach, check out these helpful tips on attracting a large audience, tips dan trik sukses live streaming untuk mendapatkan banyak penonton , which can be applied to showcasing your home improvements online.
Remember, proper lighting can dramatically enhance the overall aesthetic, creating a welcoming and visually stunning exterior.
The distance between each fixture will depend on the desired lighting effect and the type of fixture used, typically ranging from 8 to 12 feet apart.
Connecting Wires to Lights and Transformers
Connecting the wires to the lights and the transformer requires precision and attention to detail. Incorrect connections can result in malfunction or even electrical hazards. Always double-check your connections before backfilling the trenches or turning on the power.
Before starting, ensure that the power to the transformer is switched off at the breaker box. Carefully strip the insulation from the ends of the wires, exposing a small length of bare copper wire. Use wire connectors that are compatible with the gauge of your wiring. Follow the wiring diagram provided with your lighting kit to ensure correct connections.
Once the connections are made, secure them tightly to prevent loose connections, which can cause arcing and overheating. Gently tuck the wires into the trench, ensuring that they are not kinked or strained. After connecting all lights and verifying the connections, carefully backfill the trench.
- Always disconnect the power at the breaker box before working with any electrical components.
- Use wire connectors rated for outdoor use and appropriate for the wire gauge.
- Ensure all wire connections are secure and properly insulated.
- Never bury damaged or compromised wiring.
- Test the system thoroughly after installation before permanently covering the wires.
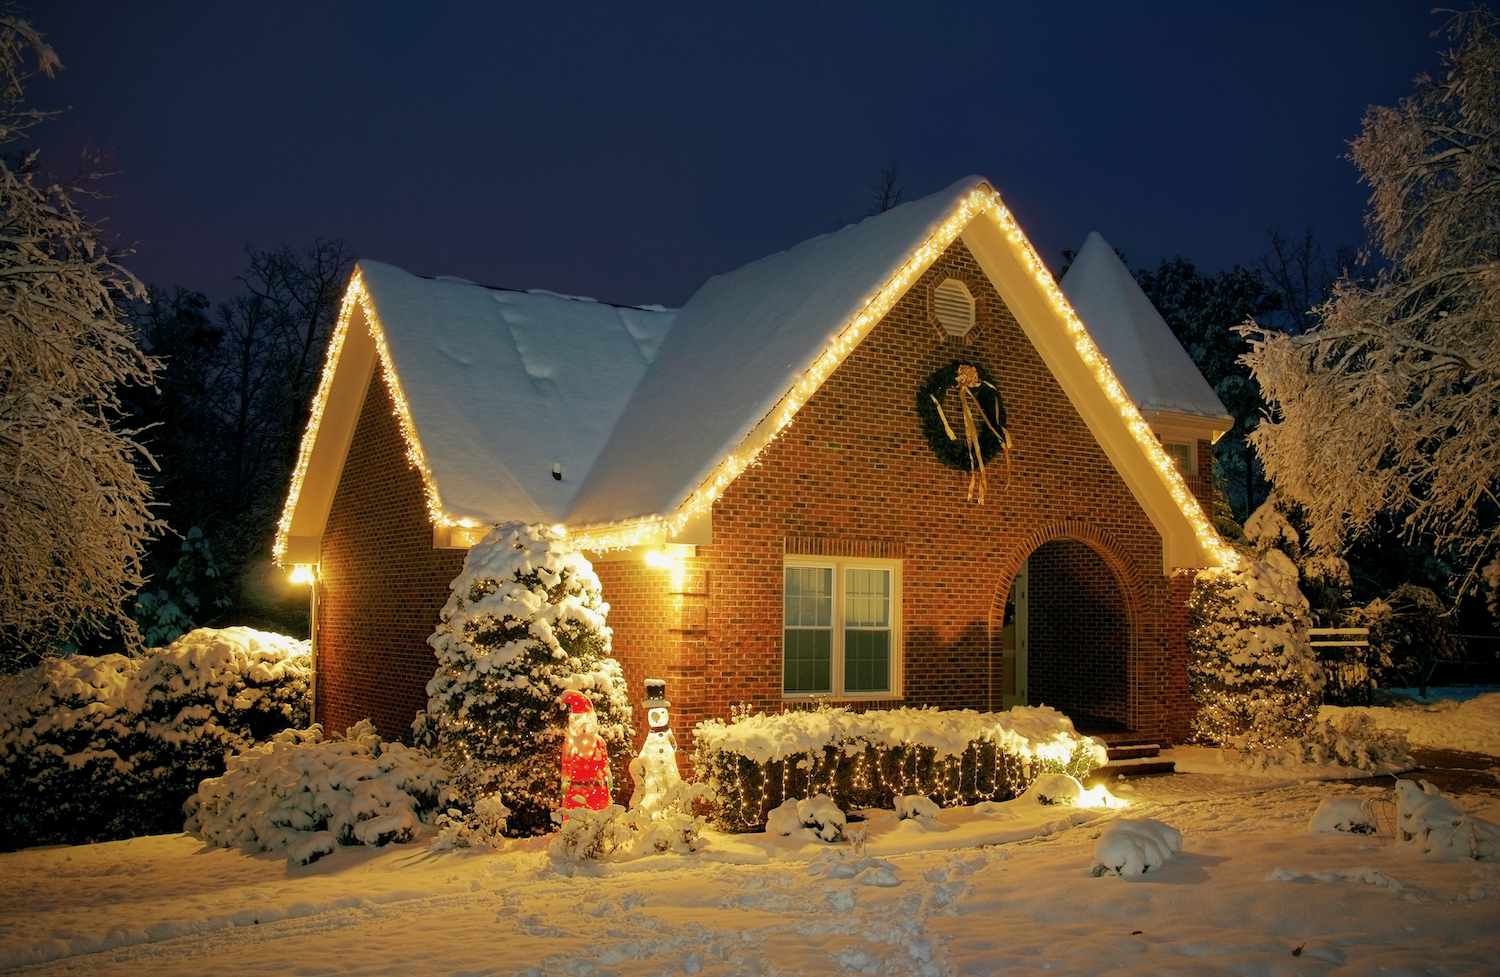
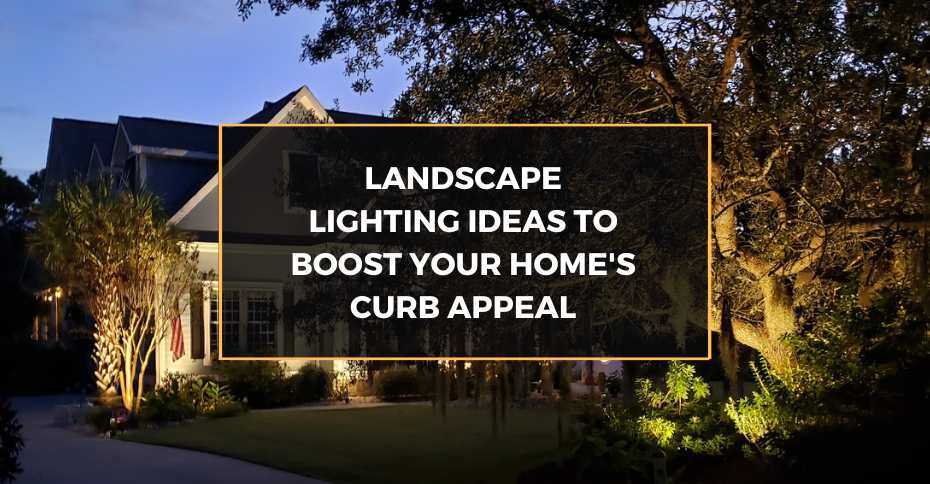
Enhancing Curb Appeal with Lighting Techniques
Strategic landscape lighting dramatically elevates a home’s curb appeal, transforming its appearance from day to night. By thoughtfully illuminating key features, you can create a welcoming and visually stunning exterior that enhances the overall property value and aesthetic. Effective lighting design considers the architecture, landscaping, and desired atmosphere to achieve a cohesive and impactful result.
Architectural Feature Highlighting
This lighting scheme focuses on showcasing the home’s architectural details. Imagine a stately colonial home with elegant columns and a prominent front door. Uplighting the columns with warm-white LED spotlights creates a dramatic effect, highlighting their texture and height. A recessed light fixture above the front door, emitting a soft, inviting glow, draws the eye and welcomes guests.
Path lighting along the walkway leading to the entrance subtly guides visitors and adds to the overall sense of elegance and sophistication. The resulting atmosphere is one of timeless charm and refined grandeur.
Pathway Illumination
This scheme prioritizes safety and functionality while adding visual interest. Consider a winding pathway leading to a garden or a detached garage. Low-voltage path lights, spaced evenly along the route, provide safe and efficient illumination. Warm white or soft amber light creates a welcoming and inviting ambiance. To add visual depth, consider using different heights and styles of path lights, perhaps incorporating some bollard lights near the house for a more substantial presence.
Improving your home’s curb appeal with landscape lighting involves careful planning and placement of fixtures. Consider using path lighting to highlight walkways, or uplighting to accentuate trees. While you’re focusing on enhancing your home’s exterior, remember to also protect your online presence; for safe live streaming, consider using apps listed on resources like aplikasi live streaming yang aman dan terhindar dari akun palsu to avoid fake accounts.
Back to your landscaping, remember to choose energy-efficient bulbs to keep costs down while maximizing the impact of your lighting.
The overall effect is one of subtle elegance and practical functionality, guiding visitors safely while enhancing the beauty of the landscape.
Landscaping Emphasis
This scheme highlights the beauty of the landscaping itself. Picture a lush garden with vibrant flowerbeds and mature trees. Spotlights directed at specific plants or trees draw attention to their unique textures and colors. Subtle uplighting on shrubs and low-lying plants creates a sense of depth and mystery. For a more dramatic effect, consider using colored LED lights to highlight specific plants or create a themed look, perhaps using blues and purples for a tranquil effect or warm oranges and yellows for a vibrant and energetic feel.
The resulting atmosphere is one of natural beauty enhanced and intensified by carefully placed light.
Creating Depth and Dimension with Lighting
Using layered lighting techniques is key to creating depth and dimension. For instance, placing a series of spotlights at varying distances from a feature like a large tree, will highlight its shape and texture, adding visual depth. Similarly, using backlighting on a hedge or shrub will make it appear to float, adding an element of surprise and visual interest.
This layering effect creates a three-dimensional feel that a single light source could never achieve.
Utilizing Color Temperature for Mood and Highlight
Color temperature, measured in Kelvin (K), significantly impacts the mood and highlights. Warm white (2700K-3000K) creates a welcoming and inviting atmosphere, ideal for pathways and accent lighting. Cool white (5000K-6500K) provides a brighter, more modern feel, suitable for security lighting or highlighting architectural features. Using a combination of both warm and cool tones can create a dynamic and visually interesting landscape.
For example, warm white lighting along a pathway could transition into cool white lighting near the front door to emphasize its modern design. This careful use of color temperature adds another layer of sophistication and visual interest to the overall design.
Maintaining Your Landscape Lighting System
Proper maintenance is crucial for extending the lifespan of your landscape lighting system and ensuring its continued effectiveness in enhancing your home’s curb appeal. Neglecting maintenance can lead to premature bulb failure, damaged wiring, and ultimately, a less aesthetically pleasing outdoor space. A regular maintenance schedule, coupled with prompt troubleshooting of any issues, will keep your lighting system shining brightly for years to come.Regular maintenance involves a combination of preventative measures and proactive problem-solving.
Boosting your home’s curb appeal with landscape lighting involves careful planning and placement of fixtures. Think of it like marketing yourself – you need to highlight your best features! To learn how to effectively showcase your strengths online, check out this helpful guide on strategi pemasaran diri saat live streaming agar lebih banyak viewers. Just as strategic lighting enhances your home’s beauty, a well-planned online presence attracts more viewers.
Properly installed landscape lighting can dramatically increase your property’s value and visual appeal.
This includes routine inspections, cleaning, and timely repairs. By following a simple maintenance plan, you can significantly reduce the risk of costly repairs and ensure your landscape lighting remains a valuable asset to your property.
Routine Maintenance Schedule
A consistent maintenance schedule is key to preventing major problems. This schedule should include tasks performed at different intervals, from weekly checks to annual overhauls.
- Weekly: Visually inspect all fixtures for loose connections, damaged wires, or debris buildup. Address any immediately apparent issues.
- Monthly: Clean fixture lenses and housings with a soft cloth and mild detergent to remove dirt and grime, improving light output and overall appearance. Check for any signs of insect infestation or damage.
- Annually: Replace all bulbs, even if they still appear functional. Older bulbs tend to dim over time, impacting overall brightness. Thoroughly inspect all wiring for damage, wear, or loose connections. Consider professional inspection if you are not comfortable performing these tasks yourself.
Troubleshooting Common Landscape Lighting Problems
Troubleshooting common issues can prevent minor problems from escalating into major repairs. Below is a guide to help you identify and resolve some common landscape lighting problems.
| Problem | Possible Cause | Solution |
|---|---|---|
| Flickering Lights | Loose bulb connection, faulty bulb, damaged wiring, voltage fluctuations | Tighten bulb connection, replace bulb, inspect and repair wiring, check circuit breaker |
| Non-functional Fixture | Burned-out bulb, tripped circuit breaker, faulty transformer, damaged wiring | Replace bulb, reset circuit breaker, check transformer for proper function, inspect and repair wiring |
| Dim Lights | Aging bulbs, voltage drop, dirty lenses, excessive corrosion on connections | Replace bulbs, check wiring for voltage drop, clean lenses, clean and tighten connections |
| Lights Not Turning On | Tripped circuit breaker, faulty transformer, power outage, blown fuse | Reset circuit breaker, check transformer, check power supply, replace fuse (if applicable) |
Safety Measures for Landscape Lighting Maintenance
Safety should always be the top priority when working with electrical systems. Failure to observe proper safety precautions can lead to serious injury or even death.
Before commencing any maintenance, always disconnect the power supply to the lighting system. This is crucial to prevent electric shock. Use appropriate safety equipment, including:
- Insulated gloves
- Safety glasses
- Non-conductive ladder (fiberglass or wood)
- Voltage tester
If you are not comfortable performing electrical work, it’s always best to consult a qualified electrician.
Final Review: How To Install Landscape Lighting To Improve Home Curb Appeal
By carefully planning, selecting appropriate equipment, and following safe installation practices, you can dramatically enhance your home’s curb appeal with landscape lighting. Remember, the key is to create a cohesive and balanced design that complements your home’s architecture and landscaping. With a little planning and attention to detail, you can transform your outdoor space into a stunning nighttime oasis that will impress your neighbors and enhance your property value.
Embrace the transformative power of light and enjoy the results!
FAQ Resource
What is the average cost of a landscape lighting project?
The cost varies greatly depending on the size of your property, the number of fixtures, and the type of equipment used. Expect to spend anywhere from a few hundred to several thousand dollars.
Can I install landscape lighting myself, or should I hire a professional?
While DIY installation is possible for simpler projects, hiring a professional electrician is recommended, especially for complex designs or if you’re uncomfortable working with electricity.
How often should I replace my landscape lighting bulbs?
LED bulbs generally last much longer than incandescent or halogen bulbs. Check manufacturer specifications for lifespan, but expect to replace bulbs every few years, depending on usage.
What are the best ways to protect my landscape lighting from the elements?
Choose weatherproof fixtures rated for outdoor use. Regularly inspect wires and connections for damage, and consider using protective covers during severe weather.
How can I ensure my landscape lighting is energy-efficient?
Use energy-efficient LED bulbs and consider using timers or motion sensors to reduce energy consumption. Properly sized transformers also contribute to energy efficiency.

- AGC Glass A Global Leader in Glass Manufacturing - February 15, 2026
- Voice-controlled home Smart living simplified - February 13, 2026
- Smart Thermostat House Your Eco-Friendly Home - February 13, 2026